Showing posts with label Cakes & Bakes. Show all posts

Saturday, February 16, 2019

Mango Cheesecake

Its almost 12 years since I started baking actively. My food lover son is now 11 years old, and the fussy eater is almost 8 years. This is a cake we made for the dad of the house on his birthday last week. One bite into the cake and the whole family exclaimed - "This is the best cake you have ever made!".

I had been wanting to make this cake for almost a year ever since I saw a proper recipe in the internet. But yeah..everything has its own time. Without much blabbering, i am straight going into the recipe. Unfortunately I don't have the step by step pictures, but honestly this is a very simple recipe...which make me wonder what in the world made me take soo long to try out.


I made the cake in a 9 inch cake tin and hence the measurement is for the same. if you'd like to make it in 6 inch tin, please halve the recipe.

 Layer 1 (Base Layer) - Biscuit layer
    Marie biscuit - 180g
    Milk - 50 ml

Crush the biscuit using a ziplock bag and rolling pin. Mix it with milk to make a slightly wet mixture. Set it firmly in the cake tin using your hands. Cover with a cling film and place in the refrigerator.

Layer 2 & 3 - Mango cheese
   Cream cheese - 400g (I used Kiri's cheese cubes)
   Sugar - 60 g
   Milk - 60 ml
   Gelatin - 10 g
   Lemon zest - 1/2 tsp
   Lemon juice - 2 tbsp
   Whipping cream - 400 ml
   Sugar - 40 g
   Mango puree - 120 g

Mix the cream cheese & 60g sugar gently using a spatula till it becomes very soft.
In a separate bowl, add milk and gelatin. Gently double boil till the mixture thickens. Take it off the heat and once the mixture cools, add to the cream cheese mixture.
Add the lemon zest and juice to the mixture and combine well.
In a separate bowl whip the whipping cream with 40g of sugar till soft peaks forms.
Add the whipped cream gently to the cream cheese mixture. Mix well.
Now take one-third of the mixture into a separate bowl, cover it with a cling film and refrigerate.
In the remaining two-third mixture, add the mango puree and mix well.

Take out the cake tin (with just base layer now) and spread the mango cheese cake mixture evenly over the biscuit layer. Cover with cling film and refrigerate for 20 min.

Afer 20 minutes, take out the cake tin and spread the cheese cake mixture (one-third minus addition of mango puree). Spread this evenly over the mango cheese cake. Cover and refrigerate for another 20 minutes.

Layer 4 - Mango Jelly
   Water - 60 ml
   Gelatin - 4 g
   Sugar - 20 g
   Mango Puree - 80 g

In a bowl, add water, gelatin and sugar. Mix well. In a double boiler, keep the bowl and stir well till the mixture thickens. Take the bowl out and allow to cool. Add the remaining mango puree to the gelatin mixture. Spread this evenly over the cheese cake mixture and refrigerate for couple of hours.

The beautiful mango cheese cake is ready to be served. You can decorate it with some mango cubes, fruits of your choice and some mint leaves.

Tip: It may be difficult to take out the cheese cake from cake tin once refrigerated. You can use a damp hot towel around the cake tin before opening up the tin. This will help to avoid cracks while opening the tin.


Tuesday, April 7, 2015

Cumin & Feta cheese crackers

I was so curious to try this recipe ever since I saw this in Sunita's World. They turned out to be delicious snack, with all the goodness of cheese in it. I need to have something salty , spicy with my tea - and this one was a perfect match.


Ingredients

Whole wheat flour - 2 cups (or use a mix of wheat, raggi, arrowroot)
Feta cheese  -about 100 gm
Cumin - dry roast and grind coarsly
Salt - as per taste
Crushed chilly - 1 tsp
Sesame seeds - 1 tsp
Crushed sunflower seeds - 1 tsp
Olive oil - about 5 tbsp
Baking soda (Bicarbonate of soda) - 1/3 tsp
Milk - 3/4 cup


Method

1. Sieve the flour with salt & baking soda. Mix in the crushed chilly, sesame seeds, crushed sunflower seeds & cumin.
2. Lightly crumble the feta cheese and add to the flour mixture. Gently mix with hand.
3. Now add olive oil & milk, little by little and mix with the finger tips till they all come together as a single ball. Don't over-do, just mix up everything together till they are moist.
4. Refrigerate for about 30 min. Then roll out the dough, into thin sheet (1/4 in thickness) and cut using a cookie cutter. Prick each one with a fork and arrange neatly in a baking tray
5. Pre-heat the oven to 180 deg. Bake the cookies for about 20-22 min till they start to brown. Take them out of the oven and cool completely before storing them away in airtight containers.

Monday, April 6, 2015

Healthy cookies

These are my favorite cookies and I make at least one batch a week. My kids savor this during the snack time, and I allow them without any guilt, as they contain all nutritious stuff.


Ingredients

Whole wheat flour - 1 cup
Raggi flour - 1/4 cup
Arrowroot powder(koovapodi) - 1/4 cup
Note : If raggi & arrowroot flour is not available, you can substitute with whole wheat flour, in which case, take 1.5 cups of wheat flour
Oats - 3/4 cup
Broken cashew - 2 tbsp (optional)
Chocolate chips - handful (brown or white) (optional)
Soft brown sugar - 3/4 cup (adjust as per your taste)
Sunflower oil - 3/4 cup
Baking powder - 1 tsp
Egg - 1
Water - 4-5 tbsp


Method

1. Sieve together wheat flour, raggi flour, arrowroot powder & the baking powder. Mix in the oats, cashew & chocolate chips. Keep it aside.
2. In a deep bowl, whisk together oil and egg. Slowly add in the brown sugar and mix well.
3. Now add the dry ingredients into the wet mixture and combine well. If the mixture is thick, add water little by little. The consistency should be wet, but you should be able to make balls out of the mixture. If its difficult to handle at this stage, refrigerate the mixture for 1 hr
4. Take the mixture out, wet your hands and take a small ball of the mixture. Press it lightly on your palm and arrange it on a baking tray. Repeat till all the mixture is used up.
5. Pre-heat the oven to 180 degrees. Place the tray in the middle rack and bake for about 20 min. Take it out when the sides starts to brown lightly. Enjoy warm or you can place them in an airtight container once cooled.

Wednesday, December 17, 2014

Jackfruit Cookies

I fail..I fail..I fail...to understand why these beautiful, tasty, nutritious cookies haven't adorned our bakeries till now. I tried this purely out of curiosity, just to know how it will turn out. Made a batch of just 15, but they were all gone in sometime..especially my little one - she loved it to the core. It had a mild jackfruit flavor (not overpowering at all). I will definitely be making it again. They tasted awsome with evening tea.


This time around I made using the freeze dried ripe jackfruit (Jackfruit 365). Next time, may be, I will use the jackfruit jam (chakka varatti) so that I can cut down on the sugar too.


Ingredients

Whole wheat flour - 1 1/2 cups
Jackfruit pulp - 1/2 cup
Muscavado sugar - 3 tbsp
Sunflower oil - 1/4 cup
Baking Soda - 1/2 tsp
Almond Slivers - 2 tbsp (optional)


Method

1. Sieve together wheat flour and baking soda. Keep it aside.
2. Mix together the jack fruit pulp and muscavado sugar. You can use normal white sugar too
3. To this mixture, add the sunflower oil and mix well with a spoon. Add almond pieces too.
4. Add the flour mixture in small batches, till all of it come together as a smooth dough.
5. Pre-heat the oven to 180 deg.
6. Take small lemon sized balls, place it on a baking sheet. Press slightly with a fork.
7. Bake for 10-12 min
8. Cool well before storing


Sunday, December 14, 2014

Raggi / Finger Millet Cookies

Its been sometime since I have been trying to add this millet into our diet. I know people make puttu, idiyappam etc with its nutritious flour. But I wasn't very sure how my kids will take it. So thought of replacing whole wheat flour with raggi flour in a cookie recipe. And me being a DIY mom, am bit reluctant to buy the ready-made flour. So had to wait till the weekend to clean, wash, dry, grind, sieve the raggi so that I can make the cookies.

I personally prefer the whole wheat version of this to the finger millet version, But its been a huge hit with my kids, who finished the dabba in 2 days. And I am happy to pack this snack for the kids' snack box.


Here goes the recipe. This is a very basic and flexible recipe. You can play around with the ingredients like me, I added in chia seeds, almond slivers etc to make it super healthy.

Ingredients

Raggi / Finger Millet flour (very fine) - 2 cups (or you can use half whole wheat flour and half raggi flour)
Eggs - 2
Baking soda - 1/2 tsp
Dark Muscavado /brown / white sugar - 3/4 cups (check sweetness, add more if needed)
Oats - 1/4 cup
Sunflower oil - 1/2 cup (add in batches, you just need enough to bring the dough together)
Water - 2 tbsp (if needed)
Hershey's chocolate chips - 1/2 cups (optional)
Almond slivers - 2 tbsp (optional)
Chia seeds - 1 tbsp (optional)


Method

1. In a deep bowl, add the egg and lightly beat it.
2. Add the oil, muscavado sugar and mix well till it all mix together
3. Sieve or mix together flour, baking soda, oats.
4. Mix the chocolate chips, chia seeds, slivered almonds.
5. Pre-heat the oven to 180 degrees
6. Slowly add the wet mixture into the dry ingredients, mix well using a wooden spoon, till it forms a homogeneous mixture. Check the sweetness, add more sugar if needed.
7. Prepare a cookie sheet (or aluminium foil), place a dollop of cookie mixture on this. Give enough space in between as once heated, it will start to space out. Its good to use a spoon to transfer the mixture to baking tray. Or wet your hand for scooping the mixture.
8.  Once the oven is hot, place the cookie tray into the oven and bake for about 10 min. 

Saturday, June 7, 2014

Granola Bar - The Healthy Crunch!

Ever since I started to work again, I have been in search of such finger food recipes. These days I have an early breakfast, before rushing to office. But by around 11, my tummy starts growling again. I found these home-made granola bars prefect for mid-morning snacks, all the more happy to find that my kids love them too!!


Ingredients

Oats - 1 cup
Crushed Corn flakes - 1/2 cup
Raw sugar - 2 tbsp
Chopped almonds - 6-8
Pitted and chopped dates - 8 - 10
Walnuts - 2-3, chopped finely
Raisins - 2 tbsp
Honey - 2 tbsp
Water - 2 tbsp


Method

1. In a bowl, mix together oats, corn flakes, almonds, dates, walnuts & raisins.
2. Heat a non-stick pan, and dry roast this mixture till a nice aroma comes. Keep them aside.
3. In the same pan, add butter. When it melts add sugar and add water slowly (if its too hot, it might splutter). When sugar melts, add the dry-roasted mixture and mixture whole thing together to form a wet mixture. Towards the end add honey and do a taste test. Add more honey/sugar if needed.
4. Line a baking tray with parchment paper. Transfer the oats mixture to this tray and press slightly.
5. Bake in a pre-heated oven (180 degrees) for about 8 min
6. Take them out and make incisions.

Enjoy with a hot cup of tea!!

Healthy (oats & cornflakes) cookies

This is my answer for my ever hungry lad !! They are healthy, crunchy, can be made in a breeze.


Ingredients

Oats - 1 1/2 cup
Crushed cornflakes - 1/2 cup
Raw sugar - 1/4 cup (adjust as per your taste)
Sunflower oil - 3 tbsp
Milk - 5-6 tbsp


Method

1. Grind togeher oats, cornflakes & raw sugar in your mixer grinder.
2. Transfer the ground mixture to a bowl and add oil and milk. Mix together with hand till you get a wet, slightly sticky mixture. If its too sticky, keep it in refrigerator for 10 min.
3. Line a baking tray. Slightly wet your hand and take small quantities of oats mixture. Roll it in your wet palm and slightly press to flatten them. Arrange them in the tray. If you would like, press the top with a fork.
4. Pre-heat the oven to 180 degrees. Place the tray in oven and bake for about 15-18 min.
Don't wait for the cookies to become hard, to take them out of the oven. They will harden as they cool down.
Enjoy with milk or tea!


Sunday, May 18, 2014

Barbie Doll cake

You might be wondering..where I went hiding for the past 2-3 weeks. I just started working again. So my daily cooking and all the experiments with food has come to a standstill. But last weekend, I had no choice but to get into the kitchen..it was my lil princess' bday and she had ordered a Barbie Doll cake way back in January when I was making birthday cake for my son. So there was no going back..I cannot disappoint her. I just had one day to make the cake, decorate it, make some party foodies like party sandwiches (recipe to follow), chicken roll, veg rolls, bruschettas, cupcakes etc etc...I was tired by end of the day..Nevertheless, a happy mom at the end of the day when I see my girl beam with pride, standing near her Barbie cake..


The cake is the simple "Hershey's Perfectly Chocolate Cake, layered up with Hershey's chocolate sauce and topped with buttercream icing. The Barbie's top dress was made with fondant!


Monday, April 21, 2014

Banana Muffins

I just followed the Banana Bread recipe and just added couple of tbsp of milk to loosen up the batter since it was thick. And finally sprinkled some choco-chips on top. They made a yummy treat.


Tuesday, April 8, 2014

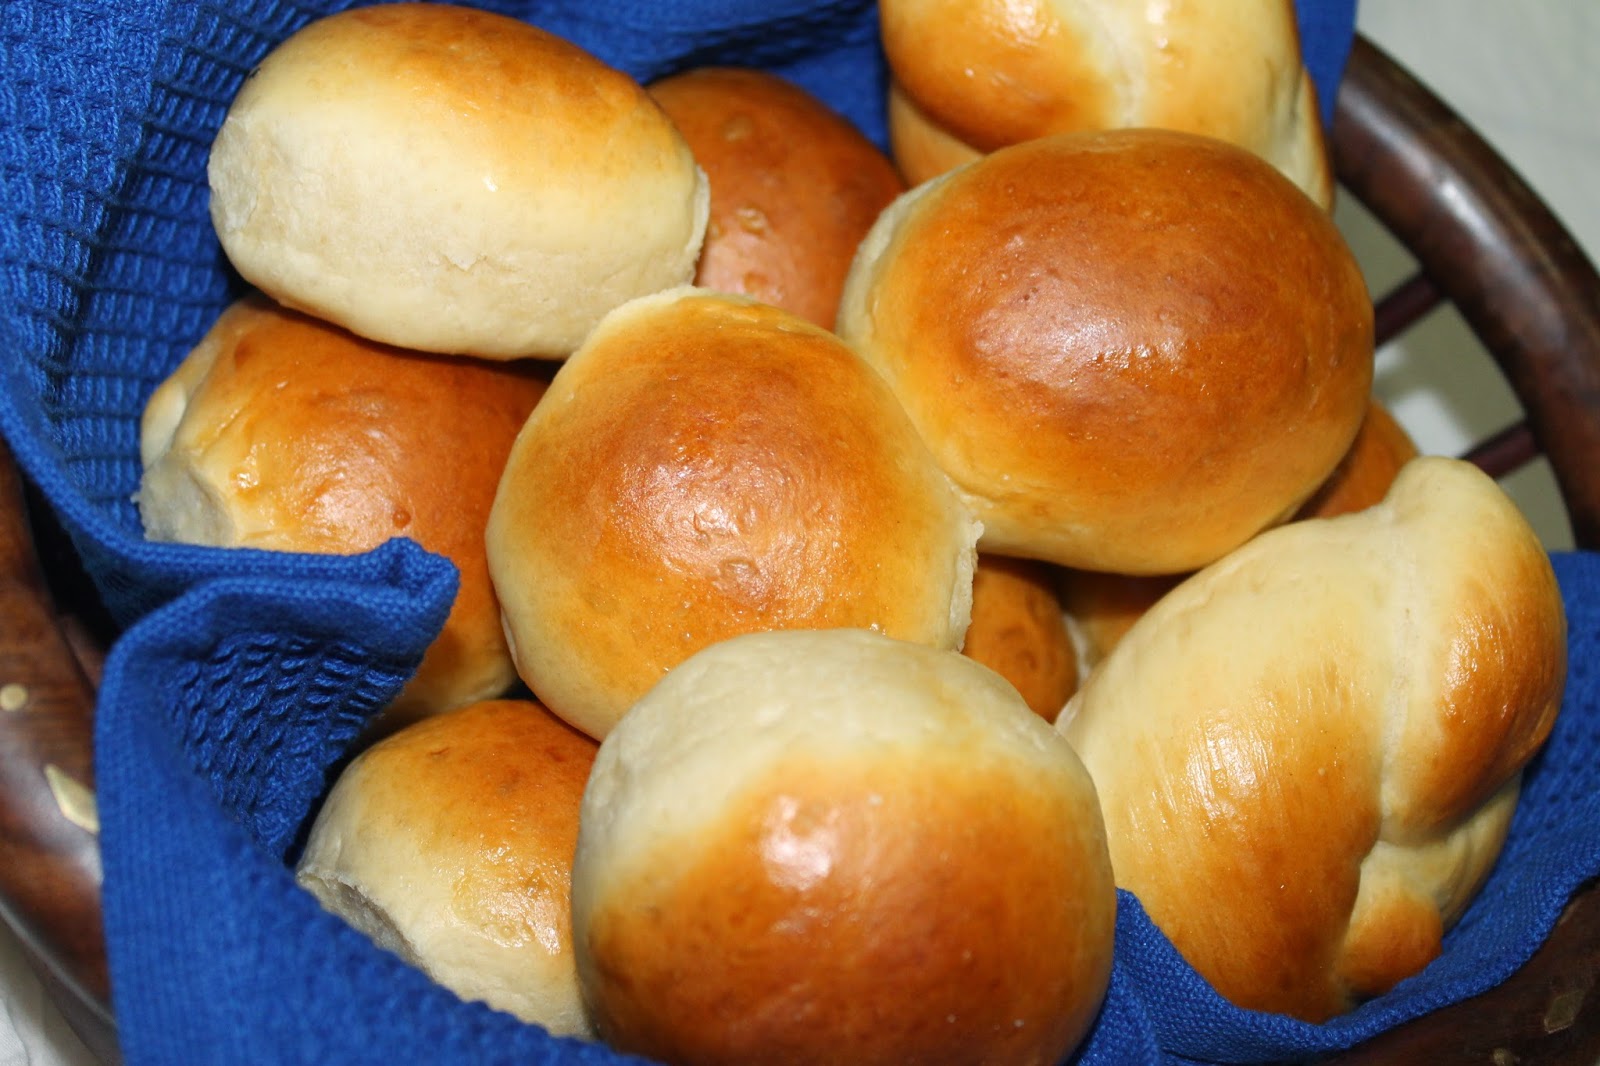
Dinner Rolls

"Good Bread is fundamentally the satisfying of all foods; and good bread with fresh butter, the greatest of feasts."
                                                                  James Beard


There is something divine about the freshly baked bread! Can't decide if it's the whole process or the aroma that fills your house when the bread is baked that gives this special effect. And as someone said, you need to be blessed to taste a freshly baked bread, right out of the oven..it tastes soo good. So please hurry up...put on your apron and start kneading...and feel blessed!!


Ingredients (yield - around 15 buns)

All Purpose flour - 4 cups
Instant yeast - 2 tsp
Warm milk - 1 cup (temperature should be around 105F)
Sugar - 2 tsp
Eggs - 2
Butter - 4 tbsp + 1 tsp for brushing the bungs
Salt - 1 tsp (avoid salt if using salted butter)
Half of an egg - for egg wash


Method

1. In a (food processor) bowl, mix the yeast, sugar and warm milk. Mix lightly and allow to rest for 10 min till the mixture becomes frothy.
2. Attach dough hook to the processor. Lightly beat the eggs and add to yeast mixture, mix well.
3. Now with the processor on (speed 2, medium), start adding the flour 1cup at a time.
4. Keep kneading for atleast 5 minutes until all flour is incorported in, Towards the end add the butter (at room temp) and knead for another 5 minutes.
5. Lightly coat the dough ball with butter/oil and cover the bowl with a wet cloth and keep it undisturbed for 1 hr till the dough doubles in size. (In winter season you'll need more time)
6. Punch down the dough (to remove all the built up air) and again keep it aside for 10 minutes.
7. Take small ball-sized dough, gently roll and place on a greased baking tray. Cover with a wet tea-towel and keep aside for another 30 min.


8. Meanwhile pre-heat the oven to 200deg
9. Lightly beat an egg (you'll need only half of an egg) and dilute with 2 tbsp of water. After 30 min, dip a pastry brush in egg mixture and gently coat the top of buns. Place the buns in the top second rack of the oven and bake for about 15 min. After that take out the tray (the crust may look slightly hard at this stage, thats normal) and immediately brush the top of buns with butter

Thats it...just bite into it..and feel the heaven on your tongue...bliss!!


Sunday, March 30, 2014

Coffee Cake

The other day I was itching to have a coffee dessert. I am not a coffee person, but I love coffee in my desserts. So I went ahead with the blogosphere search, and ended up in Deeba's blog. She is a self-proclaimed coffee-lover, so obviously had way too many coffee cakes in the index. I zeroed on the "Espresso Coffee Cream Cake", but did not stick to the recipe completely. This is the first time I am tweaking a cake recipe, and boy, it turned out to be perfect for me!! So here goes my adapted version.


Ingredients

For the sponge
Large eggs - 4, at room temperature
Raw sugar - 1 cup (white sugar is also fine)
Instant coffee powder - 1 tbsp (I used Nescafe)
Butter - 50g, melted and cooled
All purpose flour - 1 cup, sifted


The sugar syrup
Water - 1/2 cup
Sugar - 3 tbsp

For covering and sandwiching
Whipping cream - 500ml
Instant coffee - 1 tbsp, dissolved in 2 tbsp water
Icing sugar - about 4 tbsp


Method

The sponge (The tip for getting the sponge right is to be really fast in getting the batter to the oven. You build up the air in the batter by beating and slowly (very slowly) mix in the flour ensuring that the air does not escape. If the air escapes, you'll end up with a dead (read "hard") cake. Also you need to be quick in moving the batter to oven. This way you do not give enough time for the batter to release its air pockets.

1. Pre-heat the oven to 190 deg
2. Line an 8" cake pan, grease and dust with flour (I used a 6" pan and hence baked in 2 batches)
3. Beat the eggs and sugar in a deep bowl (I used my 3L cooker) over simmering water for about 5 min, till it reaches a mousse like consistency.
4.  Take it away from heat and continue beating for another 5 min.
5. Add the instant coffee powder and beat for about a minute.
6. Gently fold in the sifted flour ensuring that the air built up in batter is least disturbed.
7. Add in the cooled butter and mix in gently
8. Pour the batter to prepared tin and bake for about 15 min (mine got done in 12 min, so you need to watchful while the batter is in the oven.
9. Once the inserted skewer comes out clean, remove the pan from oven. Let the cake rest in the pan for about 5 minute. Then slightly tap the sides and bottom of the pan to remove the cake from the pan. Let the cake cool down completely on the wire rack.


Sugar syrup
1. Heat the water and sugar together. Keep it aside

Coffee Cream
1. Beat the whipping cream, instant coffee solution and icing sugar together till the cream starts to form stiff peaks. Keep it aside.

Assembling the cake
1. Once the cake has cooled completely, cut the cake horizontally into 3 (I had 2 cakes, so together I got 5 layers).
2. Place layer 1 on a cake stand. Sprinkle from sugar syrup. Top it up with some coffee cream.
3. Place the next layer on top of it. Repeat the process till all layers are complete.
4. Cover the cake completely (sides and top) with the coffee cream. Decorate with some chocolate shavings.

Tuesday, March 18, 2014

Masala / Savoury Biscuits

I am a big fan of these masala biscuit. I like these more than the normal sweet biscuits. They are perfect with a hot cup of tea in the evening. So the other day I decided to make them and they were as good as the bakery bought ones..


Recipe source : My Diverse Kitchen

Ingredients

Bowl 1
All Purpose Flour - 1 3/4 cups
Fine rice powder - 2 tbsp (I used pathiripodi)
Baking powder - 1 tsp
Baking soda - 1/4 tsp
Salt - 1/2 tsp


Bowl 2
Chopped curry leaves - 1 tbsp
Chopped cilantro / malliyila / coriander leaves - 1 tbsp
Chopped mint / pudina - 1 tbsp
Chopped green chillies - 1 tsp (as per your tolerance)
Crushed peppercorns - 1 tsp (as per your tolerance)
Sesame seeds (black or white) - 1 tbsp


Chilled butter - 100gm, cut into chunks
Curd - about 3 -4 tbsp


Method

1. Mix all the powders mentioned in Bowl 1 together. Now add the chilled butter cubes into this and slowly and gently start mixing with your finger tips (as you do for the pie crust). Keep doing till you get a breadcrumb consistency.
2. Now add all the masalas mentioned in Bowl 2. Mix together.
3. Add 1 tbsp curd at a time and gently mix together. Keep adding curd (you'll not need more than 3 tbsp of curd) till you get a moist, pliable dough.
4. Cling wrap the dough and place in refrigerator for atleast 1 hr.
5. After an hour, take the dough out and divide into 4 balls. Roll out one ball at a time to about 3 mm thickness and cut using cookie cutters. Place them on a baking tray, prick them with a fork (so that they do not fluff up) and lightly brush with oil on the top.
6. Bake in a pre-heated oven (at 180 degrees) for about 20-25 min till the top is brown. The baking time will depend on the thickness of the biscuits, so if you have rolled them really thin, then you wouldn't need so much time to brown them.


You can store them in an air-tight container once cooled.