Showing posts with label Bread. Show all posts

Monday, December 8, 2014

Stoneground Whole wheat flour Buns with Home-made Mixed-fruit Jam

I caught hold of some stoneground whole wheat from Waitrose. I was bit apprehensive, as to how my buns will turn. Nevertheless, I went ahead with my normal bun recipe. Threw in some sunflower seeds, wheat germ and wheat husk as I went along. The dough was a sticky blob, so I made sure that it sits for min 1 hour for it to double the size.

I followed the same recipe as Dinner rolls, just that I replaced white flour with stoneground whole wheat, along with other ingredients. Though they looked a bit rough, these buns were real yum, and they paired so well with the home-made mixed fruit jam.


Home-made Mixed-Fruit Jam

Ingredients

Fruits - 4 cups (I used grapes, apple, raspberry, guava. You can mix and match any fruits like strawberry, blueberry, kiwi etc etc. Just make sure you don't add all sour fruits)
Dates - 1/2 cup (pitted and chopped)
Raw sugar - 2 tbsp (adjust as per your taste)
Water - 1/2 cup
Lemon juice - juice from 1 lemon

Method

Chop all the fruits to medium size and pressure cook them along with water and dates. Wait for a whistle and then switch off. Wait till the pressure goes off.
Open the cooker, add the sugar & lemon juice. Switch on the flame and keep stirring at medium-low flame till the jam thickens.
Once it reaches jam consistency (it should coat the spoon) switch off the flame. It will thicken a bit once it cools. Pulse it in the mixer to get a smooth consistency.

Once cooled well, store in an airtight container. Since it has no preservatives, this will last only a couple of weeks, and this need to be kept in fridge always.

Monday, May 26, 2014

Loaf Bread

This is my first successful loaf...perfect & tasty!


Ingredients

For the water roux/tangzong

All purpose / Bread flour - 1/3 cups
Water - 1 cup

Method : Place the flour & water in a pan. Mix the flour well with water. Turn on the heat (low flame) and keep stirring till the mixture reaches 65C or it starts forming lines. The moisture should not be dried up completely. Keep it aside to cool.


For the Bread

Bread / All Purpose Flour - 2 1/2 - 3 cups
Milk - 1/2 cup
Instant yeast - 2 tsp
Egg - 1
Sugar - 2 tsp
Salt - 1 tsp
Water roux - approx 3 tbsp
Butter (at room temp) - 3 tbsp
White sesame seeds - 1 tsp

Method

1. Warm milk till its very warm (approx 80C). Dissolve the sugar in it. Sprinkle the instant yeast on top of it. Keep it aside for approx 10 min for the yeast to get activated and the mixture to become frothy.
2. In the food processor bowl, measure and add the bread flour and salt. Now add in the frothy yeast mixture (wait till the mixture is really frothy), water roux and egg (keep aside a tbsp for brushing later). Keep kneading at medium speed till everything comes together. Add flour if its too sticky. Keep kneading atleast for 5 minutes.
3. Now add in the softened butter and knead for another 10 min till you get an elastic, soft, non-sticky dough.
4. Dab the dough with some oil and keep it aside for atleast an hour for it to double in size. Make sure you cover it with a damp cloth.
5. Once doubled, punch down the dough to remove the air. Shape it to a loaf and place in the loaf tin. Cover with damp cloth, and keep aside for another half hour for the dough to rise again.
6. Meanwhile pre-heat the oven to 180 deg celsius. Brush the top of the dough with egg (mixed with some water) and sprinkle sesame seeds. Place the loaf tin (with dough in) to the oven and bake for approx 25 min (baking time will depend on your oven type).
7. Once baked, take out the loaf and run a stick of butter over the top of the loaf to give a shiny texture. Keep it covered if not using immediately. Cut the bread with a serrated knife, only once its cooled completely.

Tuesday, April 8, 2014

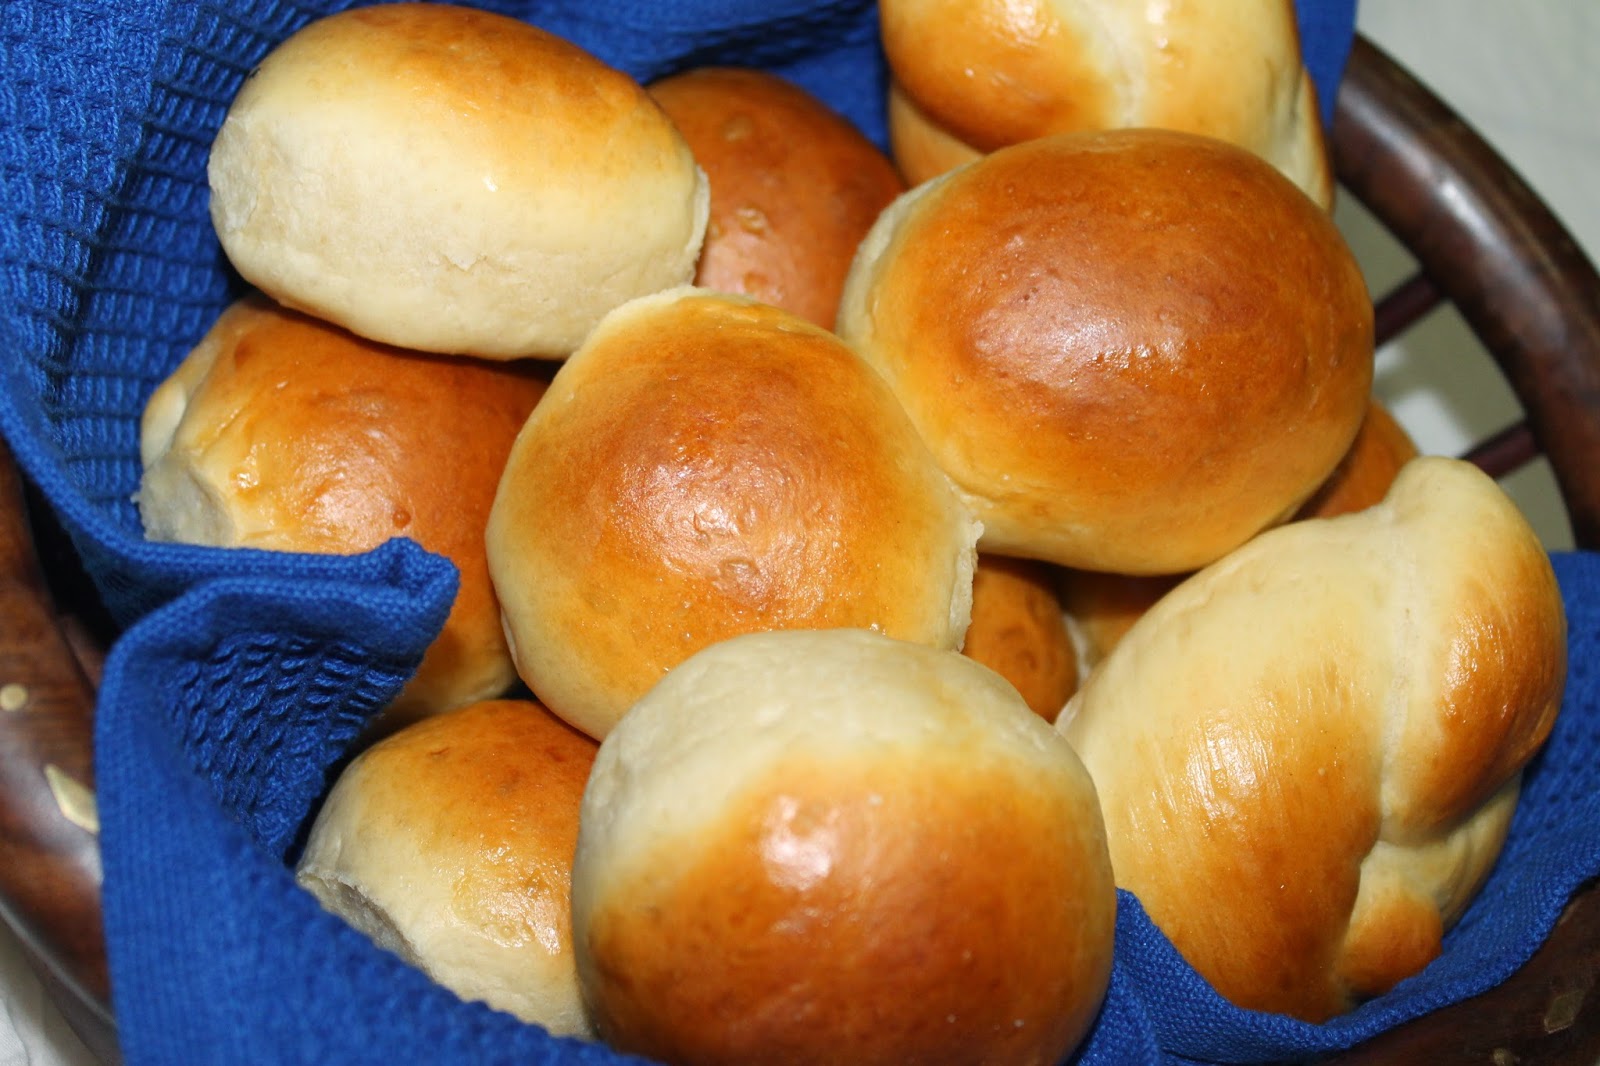
Dinner Rolls

"Good Bread is fundamentally the satisfying of all foods; and good bread with fresh butter, the greatest of feasts."
                                                                  James Beard


There is something divine about the freshly baked bread! Can't decide if it's the whole process or the aroma that fills your house when the bread is baked that gives this special effect. And as someone said, you need to be blessed to taste a freshly baked bread, right out of the oven..it tastes soo good. So please hurry up...put on your apron and start kneading...and feel blessed!!


Ingredients (yield - around 15 buns)

All Purpose flour - 4 cups
Instant yeast - 2 tsp
Warm milk - 1 cup (temperature should be around 105F)
Sugar - 2 tsp
Eggs - 2
Butter - 4 tbsp + 1 tsp for brushing the bungs
Salt - 1 tsp (avoid salt if using salted butter)
Half of an egg - for egg wash


Method

1. In a (food processor) bowl, mix the yeast, sugar and warm milk. Mix lightly and allow to rest for 10 min till the mixture becomes frothy.
2. Attach dough hook to the processor. Lightly beat the eggs and add to yeast mixture, mix well.
3. Now with the processor on (speed 2, medium), start adding the flour 1cup at a time.
4. Keep kneading for atleast 5 minutes until all flour is incorported in, Towards the end add the butter (at room temp) and knead for another 5 minutes.
5. Lightly coat the dough ball with butter/oil and cover the bowl with a wet cloth and keep it undisturbed for 1 hr till the dough doubles in size. (In winter season you'll need more time)
6. Punch down the dough (to remove all the built up air) and again keep it aside for 10 minutes.
7. Take small ball-sized dough, gently roll and place on a greased baking tray. Cover with a wet tea-towel and keep aside for another 30 min.


8. Meanwhile pre-heat the oven to 200deg
9. Lightly beat an egg (you'll need only half of an egg) and dilute with 2 tbsp of water. After 30 min, dip a pastry brush in egg mixture and gently coat the top of buns. Place the buns in the top second rack of the oven and bake for about 15 min. After that take out the tray (the crust may look slightly hard at this stage, thats normal) and immediately brush the top of buns with butter

Thats it...just bite into it..and feel the heaven on your tongue...bliss!!


Tuesday, January 28, 2014

Banana Bread


What will you do if you have got 2 big bunches of ripe banana (ethapazham) sitting in your kitchen, threatening to go from ripe to over-ripe to rotten within few days!! I was in complete dilemma the last 3-4 days, as my hubby who traveled to India came back with a really big bunch of plantains (lovingly packed my MIL). It is home grown, organic and all that stuff, which means you just can't throw it. While my hubby was away in India, I made a very relaxing trip to Lulu and had bought the week's grocery which included around 4 big bananas...I wasn't expecting him to come back with a 20 kg baggage full of fruits and vegetables from the backyard.


Since I had to use up all of those 11 really ripe bananas within few days, here is what I did...

Day 1 - I, along with my kids ate bananas as it is...3 gone
Day 2 - Made some pazham pori / banana fritters (post pending to be posted) - 3 gone
Day 3 - Made banana bread - 3 gone
Day 4 - Made pazham nirachathu / stuffed banana (pending post) - 2 gone

Hurray!! so I used up all of them without wasting even a li'l bit, and without my family getting bored of eating the same thing everyday..


Now coming to banana bread, I have made this n number of times before...but using Chiquita bananas. This is the first time I am using Kerala's own nethrakkaya for this...and it was super-duper delicious. Our home-taster (my son) gave a thumbs up and "Super" (which he rarely utters) after the first bite. This bread is slightly dense compared to the one using chiquitas, but the taste was incomparable. Above all its super-easy to make this. 


This is a very basic/flexible recipe, and you can make modifications as per things available in your kitchen, or as per your liking.


Ingredients

Very ripe (Kerala) banana - 3 (if using chiquitas, you'll need around 4)
All purpose flour - 1 cup
Whole wheat atta -1/2 cup (you can use only all purpose flour, or increase the amount of atta)
Sugar - 1 cup (I used Demarera sugar, you can use white, or soft brown or a mix of both)
Baking powder - 1 tsp
Butter - 1 stick / 100g, melted (you can use oil instead)
Salt - a pinch
Chocolate chips - 1/2 cup (optional)

Method

1. Pre-heat the oven to 180 degree Celsius
2. Prepare a 9 x 5" loaf tin (grease and dust with flour)
3. Prepare the dry ingredients. Sieve together the wheat flour, all purpose flour, baking powder, baking soda and salt, couple of times.
4. Melt butter in a sauce pan, and allow to cool.
5. Take the big jar of the mixer and add the chopped bananas. Puree it well in the mixie.
6. Now to the same jar, add the sugar and melted butter along with the banana puree and pulse of 3-4 times till the sugar, butter and banana are incorporated well.
7. Move the banana mixture into a bowl and slowly mix in the flour mixture until all are well incorporated.
8. Add half the amount of chocolate chips into the mixture and give a gentle mix. 
9. Pour the batter to the prepared tin and sprinkle rest of the chocolate chips on the top.
10. Bake in the pre-heated oven for about 40 min (this will depend on the size of your oven, so keep checking after about 35 min) or until an inserted toothpick comes out clean.


Monday, January 20, 2014

Stuffed Buns


By the time you start baking buns / breads at home, you have reached a certain milestone in your culinary journey. You'd have started off the journey with chai and egg omlette, slowly moved onto making thorans, stir fries..then onto to fish, chicken..and so on. 

I remember I used to like cooking even during school days, but my grandmom wouldn't allow me inside the kitchen for a long time. So my kitchen experience those days were limited to grating coconut, stirring in between, and tasting meat & fish dishes during lent / advent days. Sooner I became happy with this limited kitchen contact...until I reached Bangalore for my first job. I was staying there as a paying guest. Initial few days went by, where I enjoyed breakfast and lunch from office canteen and dinner from nearby restaurants. Soon the kannadiga food began to be boring for me, and I craved for some Kerala dishes. There started my culinary journey, with just one small cooker, one pot/kadai, one plate and couple of spoons. Since it was a kitchen shared with many inmates, my experiments were limited to vegetarian side dishes along with Kerala motta rice (I specifically bought the cooker for that). Even after I got married and settled in Dubai, vegetarian dishes were my forte, except for the occasional pressure cooker biriyani. I can safely say that it was after my son was born (6 years back) that I really started liking cooking / baking. I had a wonderful maid then, who was an excellent cook, and from her I learnt quite a few tricks and tips of cooking. I still remember that I wanted to bake the birthday cake for my son's first birthday, and one whole night I spent trying to do the icing. It was a flop, and my husband had to run on the eleventh hour to get a birthday cake. From then on, many experiments and flops later, here I am, presenting before you the super soft, delicious buns.  


Ingredients - for buns


All purpose flour - 1 1/2 cups
Whole wheat atta - 1 1/2 cups (I used Ashirvad atta)
Instant yeast - 1 1/2 tbsp 
Milk - 1/2 cup
Water - 1/2 cup
Sugar - 2 tbsp
Salt - 2 tsp
Olive oil - 6 tbsp

For topping / milkwash

Milk - 2 tbsp
White sesame seeds - 1 tbsp

Method

Warm the milk until its lukewarm. Dissolve the sugar in it.
Sprinkle the yeast over milk and keep it aside, undisturbed. It will take around 10 - 15 min for the yeast to get frothy. Wait till its really frothy, the softness of your bun depends on this and on the quality of your yeast. 

Measure and add both the flours to the food processor bowl. Attach dough hook to the food processor.
Mix in the salt and olive oil. 
Turn on the food processor and knead in medium speed.
Add the yeast mixture, keep kneading, approx for a minute.
Add 1/4 cup water, knead for couple of minutes more. 
If you need more water add rest of the water. You should aim to get a smooth, non-sticky dough.
Keep adding water (I had to add around 3 tbsp more water) until you get the right dough consistency. Knead at high speed for about 5 minutes.
Cover the bowl containing dough with a clean cloth or cling film.
Let it rest for about 1 hr, for the dough to rise and double in size.
Once doubled, punch down the dough and make small balls out of it. Keep them neatly arranged on a baking tray. After 10 minutes, they would slightly risen. 
Take each ball, flatten them a bit, place the filling of your choice, close the dough and roll on your palm to get a round shape without any creases.
Place them on the baking tray, cover with a cloth / cling film and wait for another 45 min.
Preheat the oven to 180 degrees. 
Dip a pastry brush in milk and and brush over the buns. Sprinkle some sesame seeds
Place the tray in the oven and bake for about 30 min or until the top of the bun has become brown and crusty. In my cooking range, it took me less than 25 minutes for the perfectly baked buns.

The filling could be anything - chicken, beef, fish or vegetable masala. I chose vegetable filling as I didnt have meat or fish with me. Below is a quick recipe of the same.

Vegetable Filling

Potato - 1 medium
Carrot - 1 medium
Beans - 4
Big onion - 1 small, finely chopped
Green chilly - 1, chopped
Garlic - 1 clove, finely chopped


Boil the veggies. In a kadai, add 1 tbsp oil and saute the onion, chilly and garlic. When they are translucent, add the boiled veggies and gently combine. Sprinkle salt and pepper as per your taste. Switch off the stove when the mixture is somewhat dry.

Sunday, January 12, 2014

Homemade Vegetable Burger

There is a certain amount of satisfaction that comes from preparing "junk food" at home...and if you can make it healthy, nothing can really beat it. Our recent addition to breakfast menu is home-made veggie burger. Its easy and pretty healthy too. We all loved it alike.


Herbed Buns

All purpose flour - 1 1/2 cups
Wheat flour (I used Ashirvad) - 1 1/2 cups
Salt - 1 tsp
Herb mixture (I used dried oregano - 1/2 tsp, fresh basil and thyme - 1 1/2 tsp) - 2 tsp
Basil

Thyme


Instant yeast - 3/4 tsp
Sugar - 1 tsp
Lukewarm water - 1 1/4 cups
Olive oil - 1 tbsp
Sesame seeds - as needed


Method

In a small bowl, add half cup water, sugar and yeast and keep it aside, undisturbed for about 10 minutes. It will become frothy after sometime. If it doesn't, wait for some more time or try to keep it in a warmer place.

Sieve the flours and add it to the food processor bowl. Add in the salt. Attach dough hook to the machine and beat at a low speed for about half minute. Slowly add in the yeast mixture, olive oil, remaining water and herb mixture and beat at medium speed for about 5 min. You need to be careful about adding water, add it slowly to get a smooth, soft dough. If you are kneading with hand, then add all the ingredients in a wide mouthed bowl and knead it throroughly for about 10 minutes.

Take the dough out of the bowl, now slightly oil this bowl and keep the dough back and allow it to rest in it. Cover with a cling film and keep it in a warm place for about an hour till the dough doubles in size. Punch down the dough and form small balls out it. Place them on a baking tray, giving enough space in between for the dough to rise again. Cover with oiled cling film and keep in a warm place to allow to rise again. This will take another 30 min.

Brush the top of the burger buns with little milk using a pastry brush and sprinkle some sesame seeds on it. After the dough has risen, place the baking tray in a pre-heated oven (180 deg Celsius) and bake for about 30 min.

Veg Patties


Beetroot - 1 medium
Potato - 1 medium
Big onion - 1 small
Green chilly - 1
Pepper powder - 1/2 tsp (as per your tolerance level)
Salt - as needed
Oil - 1 tbsp
Bread crumbs - about 3 tbsp

Chop finely the onions and green chilly.
Wash and peel the beetroot and potato. Cut them into chunks and boil them separately in water (This is because beets take more time to cook than the potato). Once cooked, drain the water  (ensure that you remove all the water!!) and mash (using a masher or fork) both potato and beetroot.
Heat a kadai, and add oil. Once hot, add the finely chopped onion and chilly. Saute till they become translucent. Now add the mashed roots and mix well. Sprinkle salt and pepper. Saute till all of it comes together. Switch off the stove.
Wait for it to cool down a bit. Sprinkle bread crumbs and mix till the entire mass dries up a bit. Now take small quantity of the mixture, place it on your palm and shape into round cutlets.


You can freeze them, if you don't intend to use it immediately. If freezes well for upto a week.

Once you are done with shaping, heat a non-stick pan and grease it slightly with oil. Place the cutlets on it and cook till both the sides turn crisp. You can deep fry them in oil too, but you really dont need to do that since all the ingredients are already thoroughly cooked.

Assembling the burger

Cut the burger bun into half.
Smear some mayonnaise or your favorite spread.
Place a leaf of lettuce (optional, I didn't have and hence omitted)
Place a thin round slice of tomato (optional)
Place a veg cutlet on top of it.
Cover with the other half of bun.


Crunch!! and enjoy!!

Saturday, December 7, 2013

Basil & Rosemary Focaccia Bread

I saw this beautiful bread in Anushruti's blog. It was irresistable!! and had to make it at once. The focaccia had all my favorite ingredients... basil, rosemary, loads of olive oil...But I found the maida to be li'l too much, so made little tweaking here and there to suit our palate. This recipe is definitely a keeper...everyone at home enjoyed it very much.


Ingredients

Instant yeast - 2 tsp (i used little more than the original recipe since I was using atta)
Milk - 1 1/3 cup
Sugar - 1 tsp

Combine lukewarm milk and sugar. Sprinkle yeast over it and keep it aside for almost 10 minutes.

Whole wheat flour (I used Ashirwad Atta) - 1 1/2 cups
All purpose flour - 1 3/4 cups
Salt - 2 tsp
Olive oil - 3 tbsp (slight variation from original recipe which called for 2 tbsp, just because I love olive oil)

Attach dough hook to the stand in mixer. Sieve and add whole wheat flour to the bowl. Add maida, salt and olive oil. Give it a good mix. Add the yeast mixture and knead the mixture for about 5 minutes. I didn't need to add any more water, and the dough consistency (smooth and pliable) was perfect. Take it out of the bowl and knead with your hand for couple of minutes more. Slightly dust a clean surface and roll the dough in a rectangular shape. Slightly grease a 9 X 12" baking tray (using olive oil) and place the rolled out dough in this. Press and spread using your palms to fit in the tray. Cover with an aluminium foil and place it in a warm place for about 1 1/2 to 2 hrs till it doubles the volume.


Meanwhile prepare the herb infused olive oil, as mentioned below.


Olive oil - 1/4 oil
Basil leaves - 8 leaves , chopped
Rosemary (I used fresh) - 2 small sprigs
Garlic - 1 pod, crushed

Heat the olive oil and switch off when warm. Add the herbs and garlic in the oil and keep it aside for about an hour.

Pre-heat the oven to 200 degrees.

Once the dough has doubled, make equal spaced indentations with your forefinger. Spoon in the herb mixture along with oil to these indentations and also brush the surface with oil.


Place it in the oven and bake for about 15 min. If you are using only maida, then baking time may vary between 18-20 min. In case of using atta, you need to be careful about the time as atta gets baked pretty fast, after which it hardens.

Enjoy it with your favorite stew or olive oil or just like that (like I did).